


Installing a toilet seat (or toilet cover) is a relatively simple process that most people can do themselves with minimal tools.
Here’s a step-by-step guide to help you install a toilet seat:
Tools You’ll Need:
- A wrench or pliers (depending on the type of bolts)
- A screwdriver (if needed)
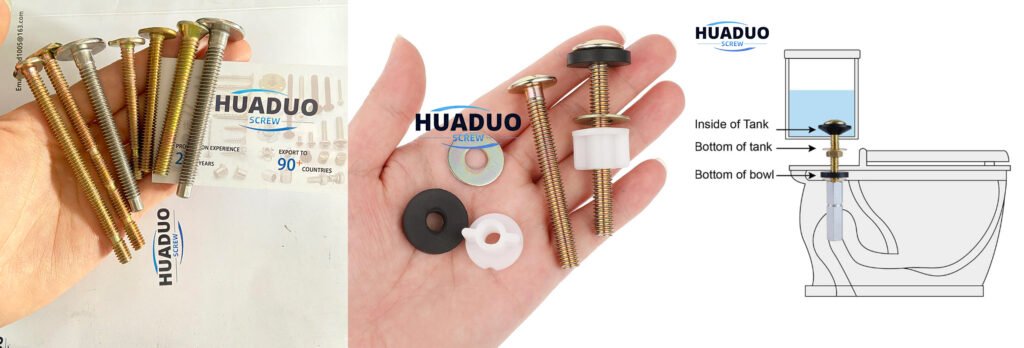
- The new toilet seat and hardware (bolts, nuts, washers)
Steps to Install a Toilet Seat:
- Remove the Old Seat (if applicable):
- If you’re replacing an old toilet seat, start by removing it. Look for the bolts that secure the seat to the toilet bowl. Typically, these are located at the back of the toilet, near the hinges.
- Use a wrench or pliers to loosen and remove the nuts that hold the bolts in place. Some toilet seats have plastic covers over the bolts, which you can pry off with your fingers or a flathead screwdriver.
- Once the nuts are removed, take off the old seat and set it aside.
- Prepare the New Seat:
- Most toilet seats come with the necessary mounting hardware (bolts, nuts, and washers). Ensure the new seat fits your toilet by aligning the hinge holes on the seat with the holes on the toilet bowl.
- If the new seat comes with adjustable hinges, adjust them so they align with the holes in the toilet bowl.
- Align the New Seat:
- Place the new seat on the toilet bowl, ensuring that the seat holes line up with the mounting holes in the toilet.
- Some toilet seats have a front “lip” that fits inside the toilet bowl, while others are designed to sit on top. Make sure it fits securely on top.
- Install the Bolts:
- Insert the bolts through the mounting holes on the toilet and the hinge holes on the seat. The bolts typically go from the inside of the toilet bowl to the outside, so the head of the bolt will be on the inside of the toilet bowl.
- Place a washer over the bolt (if provided) and then screw on the nuts from the outside of the toilet.
- Tighten the Nuts:
- Using your fingers, tighten the nuts by hand, and then use a wrench or pliers to tighten them a little more. Be careful not to overtighten, as this could crack the porcelain or damage the seat.
- Check the Seat’s Stability:
- After tightening the bolts, check the seat for stability. It should sit firmly on the toilet and not shift or wobble. If it does, you may need to tighten the bolts a little more, but don’t overtighten.
- Finish Up:
- Once everything is tightened and stable, you can replace any plastic covers that came with the bolts, if applicable, to cover the nuts and give the seat a clean finish.

Tips:
- Make sure the bolts are properly aligned to avoid putting uneven pressure on the toilet seat, which can lead to cracks or damage.
- Use non-slip washers or anti-slip pads (if available) to keep the seat from shifting over time.
- If the bolts or mounting hardware included with your new seat are too small for your toilet, you can purchase replacement parts at a hardware store.
That’s it! You’ve now successfully installed a toilet seat.
Huaduo Screw Factory specializes in the production of toilet bolts, cistern bolts, and various fastening accessories. With over 20 years of experience, we offer customized solutions for a wide range of fasteners and related components, catering to the specific needs of our clients. Our factory supports both standard and non-standard product designs, ensuring high-quality manufacturing that meets international standards. Whether for residential or commercial applications, we are committed to delivering reliable, durable fastening solutions tailored to your requirements.